Christian_Chourot
New member
A while ago I took my Duo apart to explore why it wasn't working too well. I thought I'd take it apart again and take some pictures to show everyone what's inside.
First things first - If you do any of this, before you start, take the batteries out, there is a lot of bare metal inside and I managed to short the battery and heat things up very nicely when I first opened this up. Ooops.
Well that's about it. It's straightforward to put it all back together as long as you were paying attention when you took it apart. Pay particular attention to where the wires run, they run underneath various points to let everything slot together neatly and none of my photos of them came out well.
I hope this has been of interest/use to some people if their light is out of warranty and they fancy taking it apart. It is possible, it's just not easy to lever the whole thing out the first time. I wouldn't recommend doing any of this unless you really have to though.
First things first - If you do any of this, before you start, take the batteries out, there is a lot of bare metal inside and I managed to short the battery and heat things up very nicely when I first opened this up. Ooops.
| 
| 
|
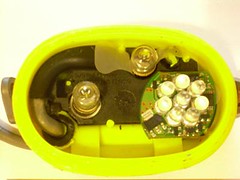
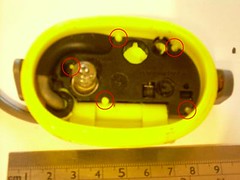
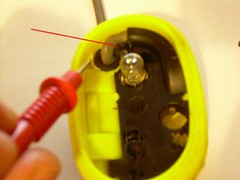
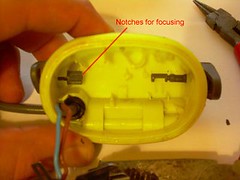
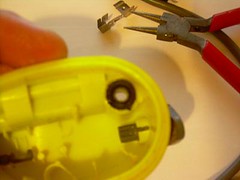
| 1) The naked duo - let's pull out the LED and spare bulb | 2) Here I've circled the 5 yellow posts that you need to saw off with a scalpel etc to be able to pull the rest out. | 3) I also prized away the yellow strip shown by my probe, and cut the black plastic at the point shown by the red line to make it easier to remove the gubbins inside. This is very difficult to pull out, I remember using a combination of jewelery screwdrivers and pliers but don't recall exactly what I did. |
| 
| 
|
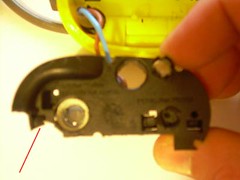
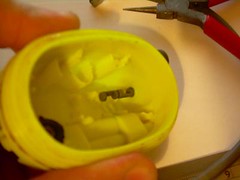
| 4) See? There's a bit missing. Doesn't seem to matter much though. | 5) Here you can see the notches that move the bulb up and down for focusing the spotlight. The bulb holder is a movable piece of white plastic that has corresponding notches. | 6) And here is a view down the hole through which the wire enters the light - you can just about see how the black ring I cut off isn't part of a seal, all that seals the unit is how tightly the wire fits inside the yellow bit. Sorry the photo isn't better, it's the best I could do. |
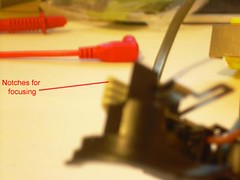
| 
| 
|
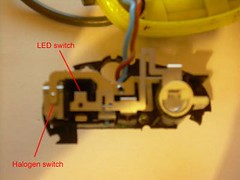
| 7) Here's the edge of the bulb holder. | 8 ) And here's the end of the switch emerging inside the light. Two parts of the shaft are reduced to flat surfaces at different angles to each other. The one nearest to the edge of the light operates the halogen bulb, the other one operates the LED. The movement of the metal part that the latter surface sits on is very subtle and it's easy to mess up operation of the LED if you managed to bend it. | 9) The switch in each position, I'm sure you can work out which is which. |
| 
| 
|
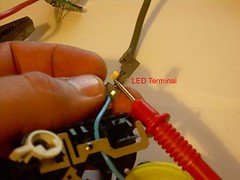
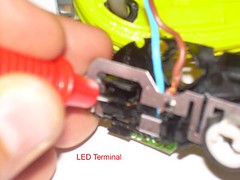
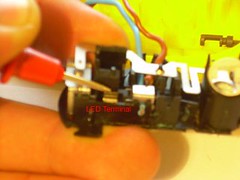
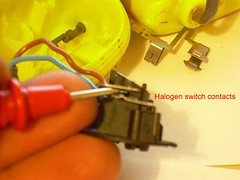
| 10) The posterior aspect of the gubbins. Here you can see the points that the switch operates. Note how there's not much to push on to switch the LED on and off. | 11) This is the part in contact with one leg of the LED. I'm afraid I forgot to get my multimeter out so I'm not sure if it's for the anode or cathode but you can test the LED itself if you want to work it out. It's just a tiny bit of sprung metal. I bent this out a bit to solve part of my problem with my light, It would often go out if I bumped my head and I suspect that this was in part to blame although there was also a problem with my battery box. | 12) Don't remove the post in the middle of this metal piece, or in fact remove this piece of metal. It's a pivot point required for the halogen switch to work properly. |
| 
| 
|
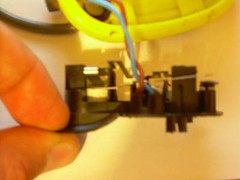
| 13) Here's where the other leg of the LED Module makes contact with a sprung, bent piece of metal operated by the switch - in other words, the metal piece is moved onto the leg of the LED to make it turn on. Don't bend this sprung piece unless there's something wrong with it and your light isn't turning on, if it's bent too far your LED will be on all the time - like I said, the switching action is subtle. | 14) Once again, here's the permanently connected leg of the LED module. | 15) Here's the halogen switch from the side. |

| 
| 
|
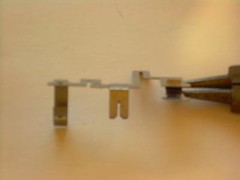
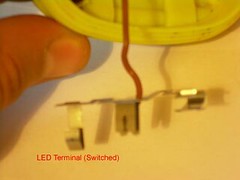
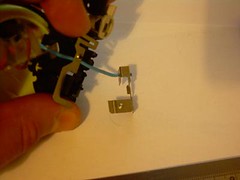
| 16) You can see (just about) in this picture where the blue wire makes contact with the permanently connected LED leg. When the halogen switch is closed, it's this wire that supplies the side terminal of the halogen bulb. | 17) See the uppermost bit of metal? That's the bit that's coming off next, it supplies the bottom terminal of the halogen bulb. It levers off fairly easily. | 18) Here it is, on the left is the moving (switching) contact of the LED, in the centre the grove that cuts into the wire supplying this piece and on the right is the bottom terminal for the bulb which can be a pain to get back in position sometimes to pay attention before you take it out as to where it should sit. |
| 
| |
| 19) Here'e the wire connected up, ready to put back in. There's just a nick in the insulation and the wire is rammed down tightly to bring the wire into contact inside the metal groove. | 20) Finally, here's the other removable piece where the blue wire is connected. The blue wire passes underneath the metal that pivots on the black plastic post that I suggested not to remove. |
Well that's about it. It's straightforward to put it all back together as long as you were paying attention when you took it apart. Pay particular attention to where the wires run, they run underneath various points to let everything slot together neatly and none of my photos of them came out well.
I hope this has been of interest/use to some people if their light is out of warranty and they fancy taking it apart. It is possible, it's just not easy to lever the whole thing out the first time. I wouldn't recommend doing any of this unless you really have to though.


