Taking pics with the olympus tough tg 5

The Old Ruminator

Well-known member
Remember that you have a big advantage with the TG Series. They are waterproof and you can get some " interesting " underwater shots. You might not see the viewfinder clearly so take a few.

Bubble in a bubble. Withyhill.


The Old Ruminator

Well-known member
Remember that the TG Series is all about Fun Photography. " The Moment " a set up shot can never accomplish without looking posed. That specially with portraits.

" Sleeping in the Job, Vurley "


The Old Ruminator

Well-known member
I Auto on the default setting will ramp up the ISO, increase the exposure and the exposure time.

The Frozen Deep Pitch.

Hand held I Auto rated at 800 ISO, tenth of a second at f2. You get what you get and it can work acceptably. A slight tweak of the colour might help but dont try to sharpen it. Always work on a copy of an original when editing. Nothing was posed in this view. It just worked out that way.


The Old Ruminator

Well-known member
And of course -

Live Composite Mode.

Practice at home in the dark somewhere. Its tricky not to burn out a section. This was a very rushed job. Being a proud dad I took my son to see The Frozen Deep in Reservoir Hole. Just us two and a short trip. I wanted a classic shot of TFD with my son in it. Yes more figures would have helped the scale but as I said you get what you get.

TG 4, Mini tripod and bright hand torch.


For this one he wanted a rest so I just left him where he sat. I could have asked for a classic pose but why follow the crowd ?


Both above are the original formats. The top one can crop to a vertical format just straightening the far off pillar. The bottom one can have the subjects shadow cloned out. With LCM you can tweak formats and clone a little out or slightly lighten or darken the image. Always best to do multiple LCM exposures at the time as it takes only a few seconds each time.
 

The Old Ruminator

Well-known member
With programme Auto shots I use my Scurion headlamp a lot. I think a bit of background lighting can balance the composition and it does not matter if its out of focus.

30,000 year old cryogenic stal in The Frozen Deep.


This view gives you a diagonal rule of thirds ( ish ) and takes away the unbalanced view of the thirds line in the middle. It also draws the eye down to the human subject. A black background will also give a perception of image clarity.


The Old Ruminator

Well-known member
Macro/Microscope. The TG Series sensor will give you reasonable macro shots but you have to get exceptionally close to your subject. The image you get will have focus fall off near the edges so allow for that in the composed image and crop it out. A black background will give an illusion of sharpness.

Bortyoidal stalagmites with TG 2 on Macro. Of course the depth of field will be tiny so sometimes its easier to take a normal high res image and crop in.


More fun. Can you see what I have done here ?

Macro Mirror Image.


You can get a " ring flash " for the TG Series but its not true in the usual sense as its a prism that reflects the cameras own flash to a ring clipped on the the lens. I have found it difficult but others might like it. I normally use I Auto with a helmet light from the side.


pwhole

Well-known member
There are programs out there that will let you do 'Focus Blending', which will take a stack of (tripod-mounted) photos of the same subject, but all taken with different focal points. giving massive depth-of-field for a close-up subject. This is akin to the front/backplate manipulation of a large-format camera utilising the 'Scheimpflug principle':

https://en.wikipedia.org/wiki/Scheimpflug_principle

It allows photos like this to be produced, and would work great on tiny cave formations like those shown above.
 

Attachments

  • Stump1_sm.jpg
    Stump1_sm.jpg
    162.7 KB · Views: 168

Fulk

Well-known member
Two days before going on a caving trip to Hungary, we decided to buy an Olympus TG 5 . . . we really should have bought it sooner and given ourselves time to practise with it. I took a few snaps round the house and garden the day we bought it, and was quite pleased with the quality of the results.
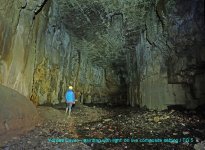
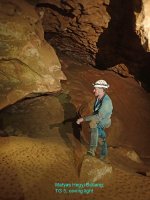
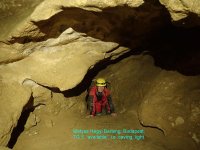
Our first trip in Hungary was to Matyas Hegyi Barlang, part of the show cave that runs under Budapest.
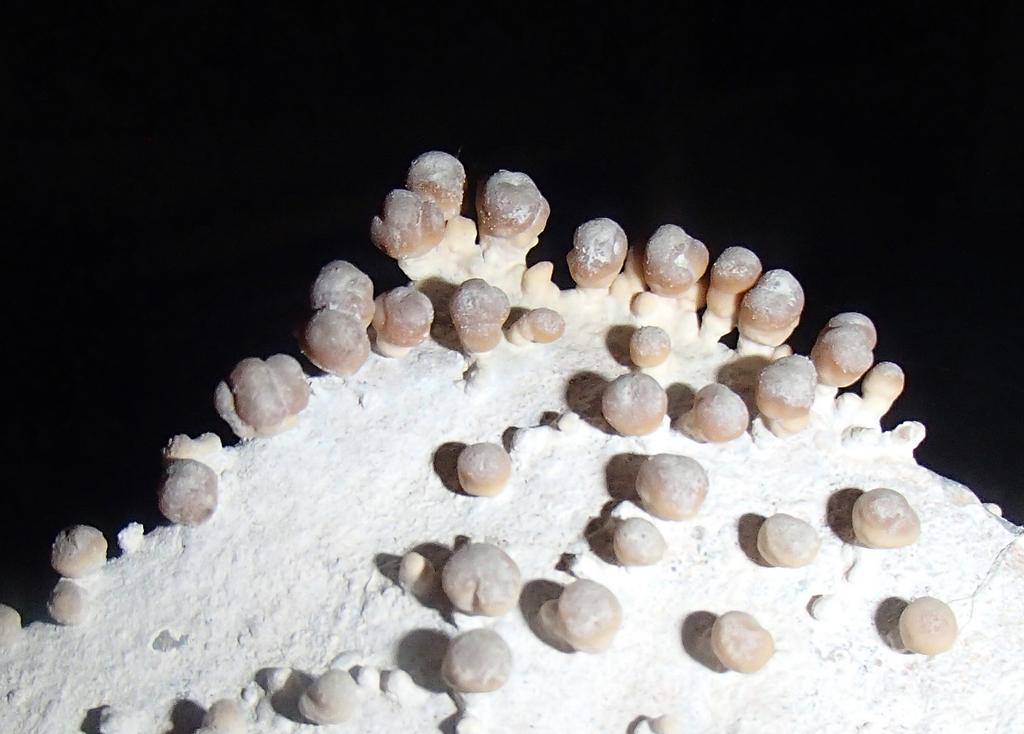
We tried taking pictures by caving light on the P(rogramme) setting, with some modest degree of success; my lamp has both spot and diffuse settings, and on the spot the colours went a bit to pot, being somewhat of a yellowish hue. On the diffuse setting, however, the pictures came out more as expected, with a sort of brownish hue (plus, of course, they were more evenly lit).
Our second caving trip was to Pal-Volgyi Barlang, which is another part of the same cave ? but with bigger passages and less strenuous. We tried the same technique as before for our photography, again with modest results.
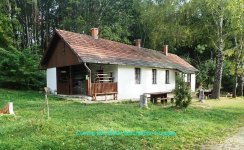
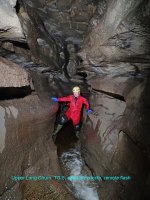
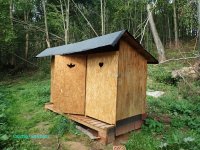
A day or two later we set off for the B?kki Mountains, where we stayed in a caving club hut. It?s quite a nice hut (notwithstanding the lack of running water and electricity), in the middle of a forest in the middle of nowhere, with a splendid long-drop khazi out back (bats for boys, hearts for girls).
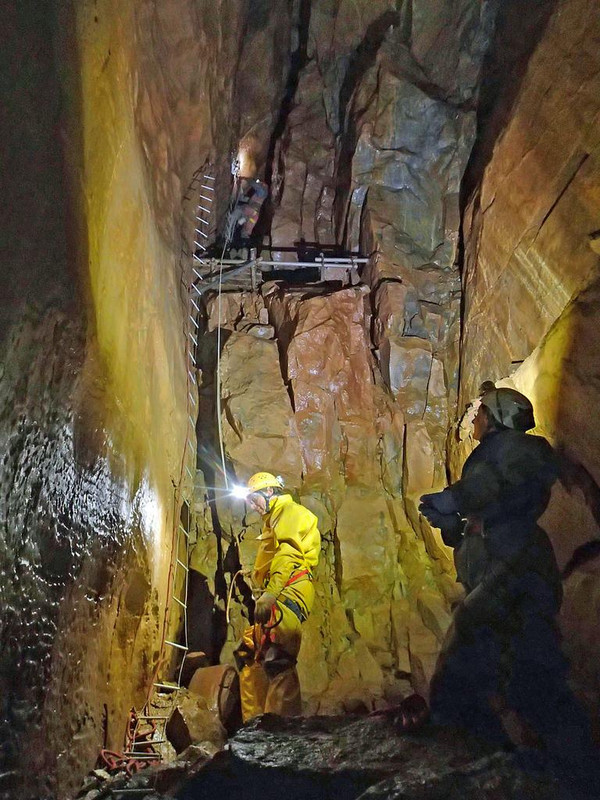
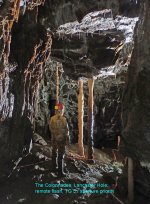
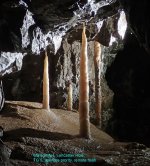
In the hut we started to faff with the camera, to try and discover some way of setting off remote flashes; we found that by taping red insulating tape over the camera?s built-in flash, we could fire remote guns with a minimum of foreground lighting. The camera has an aperture-priority setting, but it is restricted to just three f-stops ? f/2, f/2.8 and f/8 ? so to get the correct exposure involved a bit of faffing, setting off aperture against ISO setting.
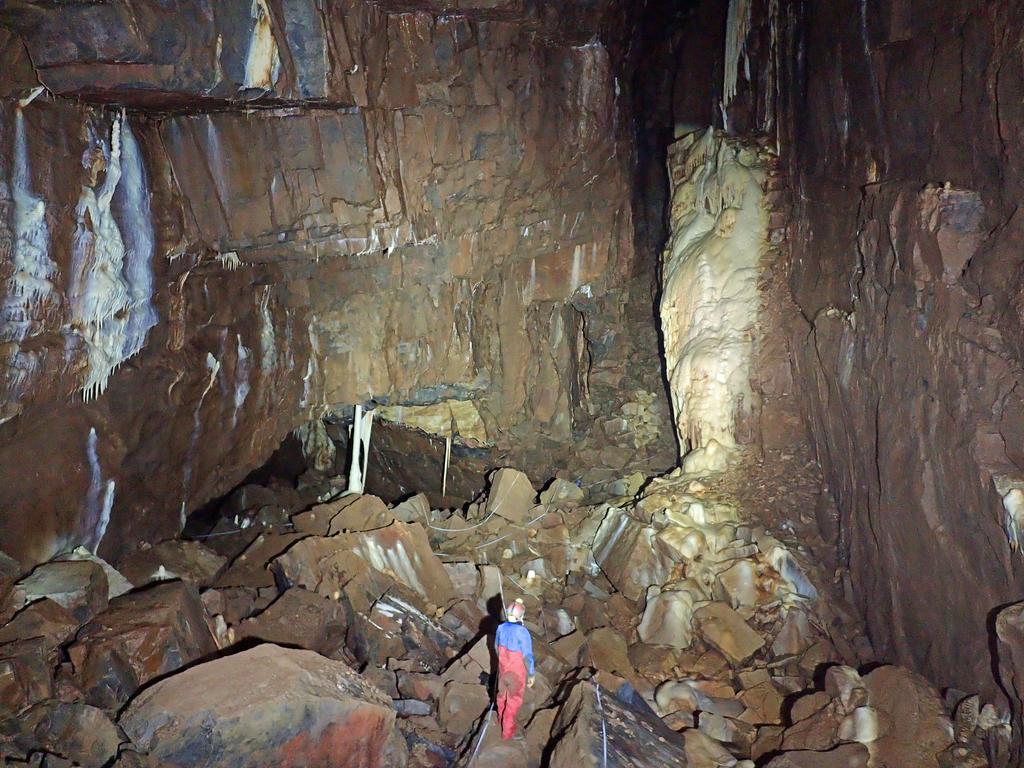
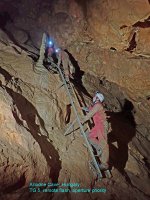
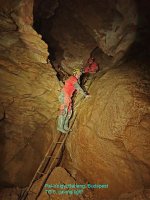
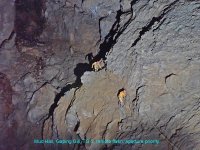
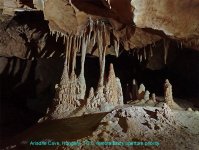
Our third trip was to Ariadne Cave, which is situated a few miles to the NW of Budapest, where we tried the technique outlined above.
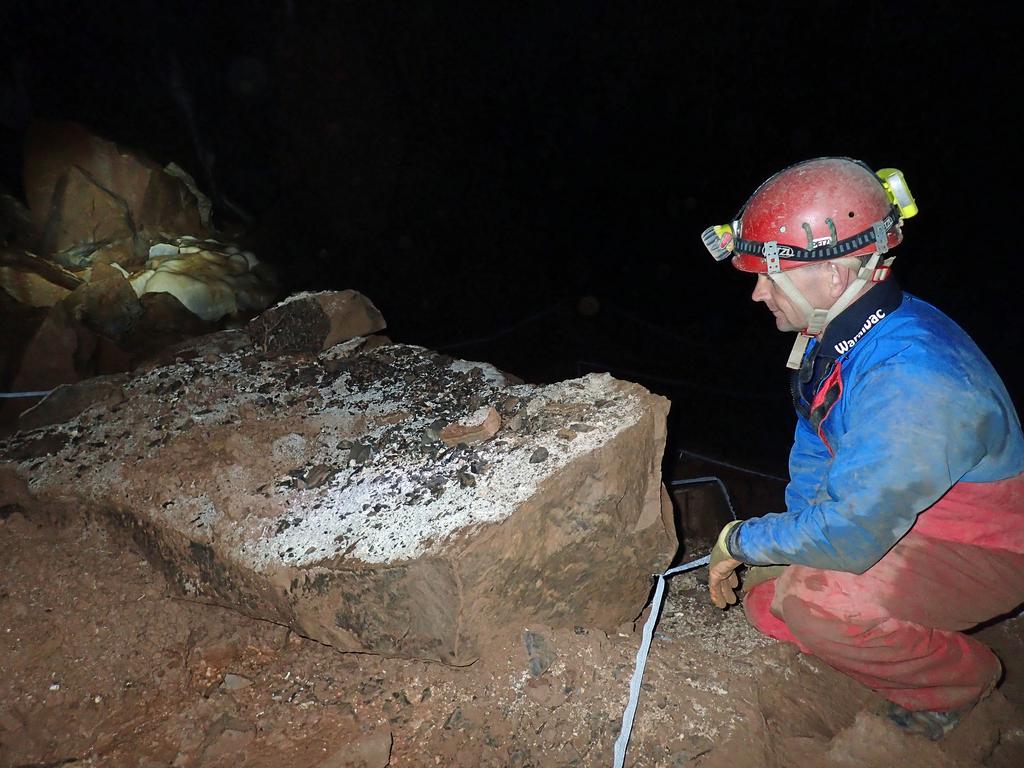
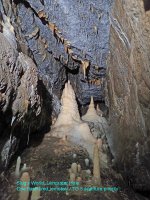
When we got home we made a little open-sided cardboard box with a hole cut in it, and covered the hole with two layers of ?infra-red filter? (old film, not exposed but developed) such that when slipped over the camera the IR filter covered the built-in flash. This then fired off-camera flash(es) in synchronization. It sounds naff . . . it looks naff . . . but it works! To focus, we relied on the camera?s auto-focus mechanism with a caving light trained on the subject, in the hope that the flash would overpower the ?available light?.

Conclusions

We have an A4 printer, so I decided to pick a couple of ?portrait? images shot above ground in good lighting, cut out the central sections of them, and print these sections up at A4 ? thus giving the equivalent of A3 prints. The results were, in my opinion, excellent ? especially when you consider that the camera is, when all is said and done, a point-&-shoot compact (albeit quite a sophisticated one).
So far we?ve made small prints and A4s, plus we?ve included quite a few (up to ~A4) in a Photobook. The TG 5 gives good, clear pictures, with excellent colour rendition. The current screen-saver on my computer is a cropped ~18.75" ? 10.5" (equivalent to a 18.75" ? 14.1") picture taken underground on the TG 5, with a minimum amount of ?tweaking? (minor changes to shadows and highlights, plus a modest degree of sharpening), and it looks fine at this scale, even when seen quite close up.
One limitation of the camera for underground use is the limited range of f-stops; another is the lack of a ?B? setting ? though I guess to some extent the live composite setting could be used as a quasi-B setting?


Attachments

  • Yordas Cave.jpg
    Yordas Cave.jpg
    175.8 KB · Views: 175

Fulk

Well-known member
Rats; I tried to post a whole bunch of snaps, but only one has appeared! So, I'll try again.
 

Attachments

  • Matyas Hegyi Barlang 2.jpg
    Matyas Hegyi Barlang 2.jpg
    110.1 KB · Views: 173

Fulk

Well-known member
It looks as though I can only post one snap at a time:
 

Attachments

  • Matyas Hegyi Barlang.jpg
    Matyas Hegyi Barlang.jpg
    109.9 KB · Views: 177

Fulk

Well-known member
And another TWO ? wow
 

Attachments

  • Lancaster Hole 2.jpg
    Lancaster Hole 2.jpg
    156.3 KB · Views: 170
  • Lancaster Hole.jpg
    Lancaster Hole.jpg
    181.4 KB · Views: 159

Fulk

Well-known member
And more
 

Attachments

  • Caving hut.jpg
    Caving hut.jpg
    184.8 KB · Views: 164
  • Upper Long Churn copy.jpg
    Upper Long Churn copy.jpg
    136.6 KB · Views: 162

Fulk

Well-known member
Some more
 

Attachments

  • Ariadne Cave 2.jpg
    Ariadne Cave 2.jpg
    165 KB · Views: 175
  • Caving hut khazi.jpg
    Caving hut khazi.jpg
    198.1 KB · Views: 157

Fulk

Well-known member
And more
 

Attachments

  • Pal-Volgyi Barlang, Budapest.jpg
    Pal-Volgyi Barlang, Budapest.jpg
    141.8 KB · Views: 166
  • Mud Hall Traverse.jpg
    Mud Hall Traverse.jpg
    154 KB · Views: 160

Fulk

Well-known member
And two more
 

Attachments

  • Stal., Lancaster Hole.jpg
    Stal., Lancaster Hole.jpg
    176.8 KB · Views: 159
  • Ariadne Cave.jpg
    Ariadne Cave.jpg
    143.2 KB · Views: 161

flashmonkey

New member
Hiya everyone I took these in cwmorthin on Sat after about 20mins playing with 3 flash guns what do you guys think. Again thank you chunky for your help
 

Attachments

  • OI000093.jpg
    OI000093.jpg
    253.4 KB · Views: 159
  • OI000099.jpg
    OI000099.jpg
    471.5 KB · Views: 161

royfellows

Well-known member
I did a bit of messing about with the XP 120 and the Imolent DX 800 over weekend. I made a diffuser up for the torch and tried it in a mine I was working in. Disappointed with the results. I had the old issue from way back of finding somewhere to place the torch, could not, so ended up walking in front of the camera on a tripod holding the torch. I get the impression that the camera needs light to get started for some reason, I was trying to set it up on the self timer. Found it very fumbly, and lack of viewfinder meant I need my reading glasses to do anything.

Now I also have bought a Sony H400. This piece of kit really rocks. But yet to try it underground. Only criticism is that on the manual shooting I could not find the shutter speed setting. F stop is obvious as it says "F" then the number, but shutter speed is just a number and no "S" in front of it to tell you what it is. Apart from that, as I said it rocks. Best thing I have bought in ages.
A lot of mines are walk in with the odd scramble, so can get away carrying kit like that. I have ordered  a waterproof hard shoulder bag for it.

Later in the year though I want to try and get to western Cwffty by way of Parc Lead Mine, chest deep ochre and wet ladderways. No photographs since the 1990s, so if I can master the XP 120 there is a good mission for it. I think patience a vital ingredient.
 

pwhole

Well-known member
Those photography bean bags might be a handy way of positioning a torch? I've got one with a male tripod stud in it, so the camera can be screwed on, but I think 'blank' bags are also available, so you can just stuff it on a handy ledge.
 
Top